Online 3d configurators adopting very quickly and suggest more and more options for creating appealing visual styles, configuration and service functionality for your products. It’s a pretty rare segment of product promotion that doesn’t use DIY customer modeling possibilities — starting from home and office furniture, jewelry, clothes, shoes, and bags and up to narrow specific machines, automobiles and accessories, cottage villages, yachts and much more. You can use it for customer experience with products from different prices category. It’s hard to say does B2B or B2C have more demand for their supply chain product configuration. Manufacturers of medical devices, buildings machines, hotels, restaurants, casino business suppliers, auto parts suppliers require enhancing the experience of their customers of different sale phases. B2B and B2C companies constantly looking for sale growing function and it could be implemented with the smart 3d configurator. The final look tuning of the product could become a selling trigger for e-commerce customers. Modeling, designing, and construction of specific products possible with the help of the right designed and developed 3d configurator. One of the most important point becoming smooth integration with the existing e-commerce system and processing the full cycle of the product selling process. Our team building a platfrom solution for that kind of integrations and deep management of the product configuration workflow and 3d assets. That’s required rethinking most of e-commerce stages. How to make the right decision about 3d technology on your site? The product customization process could become art or pure functionality or a balanced combination of both. As most of the creative fields designing and adopting live 3d experience for your domain should start with scenario scripting. While final customer experience imagination its also important to focus on the understanding of data structure, visual and functionality building blocks. Let’s start with the purpose of configurator for your business. As it was already mentioned it could be tune around the final look of your customizable product. Getting maximum value from initial customer product experience is always a win-win strategy for both the customer and sales department of your business. Involving customers creativity and design engagement could become a powerful tool for analyzing their behavior and taste. Configurator functionality for a customizable product based on its production and distribution lifecycle. Different stages of product manufacturing and distribution could allow a different set of possible options for customization. It could be one tire of multi-tire customization layers. While most of the current marketing and promo configurators are variations of one tire structure, multi-tire configurators should be deeply integrated into the manufactory process and relate to lean and on-demand products supply strategy. But even one tire selling configurator could be also a very good companion for optimization of your e-commerce processes that will have a positive impact on logistic, warehouse, and material supply chain. Let’s mark check what you need to define your configurator specification. Most of the current technology for configurators are fit into a one-page progressive web page. So in terms of web development, it is going to be front-end PWA. However back-office and administration part of your configurator could be a pretty complex system. So in general online product configurator specification should look like a specification for web development. But as we adding new experience dimension it’s becoming too much wider than just web development projects. The creative part of 3d experience becoming an independent art project. You should involve visual art professional that could speak the same language with technical people. We at VisionExp.io suggest to pay attention to the following points:
- Formalize the data that highlight the nature of your customization process.
- Define data structure and format
- Defines rules to convert between data and customization option
- Create/choose a visual style for customization options
- Define functional blocks and their behavior
- Trace backward changes to the data model you’ve created on the first and second steps.
Here are a few examples of short User Stories for furniture customization configurator project we implemented for one of our customers:
User story: Add new cabinet section Expected result: The new section should be presented and fit to the existing construction frame with the same dimensions as the original section. How to implement: Click on button add-a-Section-to-the-design Select section from suggested (highlighted with green)
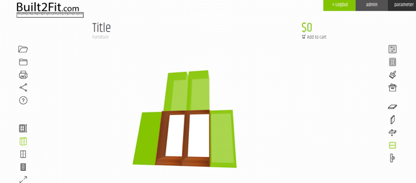
Implemented result: New section added as expected. The section could be added in any projection
User story: Change the material of the furniture frame Expected result: Ability to change the material of the model frame. How to implement: Click on button Opens Material Selection Sidebar Open Sidebar where presented set of accessible materials for the frame.
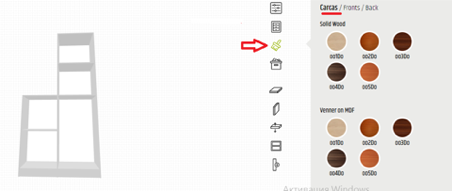
Implemented result: Material of the furniture frame instantly changed and rendered in the current 3d projection of the model as presented on the screen above.
User Story: Change material of the furniture facade Expected result: Ability to change material of the furniture facade (drawers and doors) How to implement: Click on button Opens Material Selection Sidebar Open Sidebar where presented set of accessible materials for the facade.
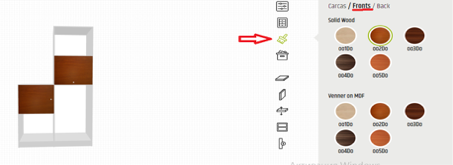
Implemented result: Material of the furniture frame instantly changed and rendered in the current 3d projection of the model as presented on the screen above.
User Story: Adding Fix Shelf and Adjustable Shelf Expected result: Adding Fix Shelf should break down previously added door on corresponding shelf’s pieces. Adjustable Shelf should remain inside of the section. How to implement: Create a frame for the cabinet furniture. For example, the width and height of the section frame should be not more than 660 mm
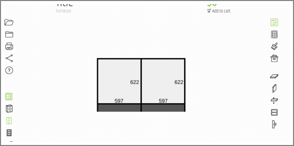
Add doors
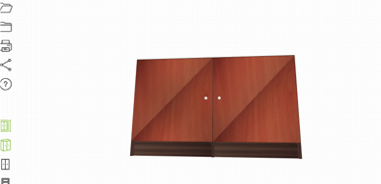
There are no shelves inside the section for now. Add Adjustable Shelf from the left side and Fix Shelf from the right side. When we put the door in place again, the left side should be not affected while the right side should consist of 2 doors.
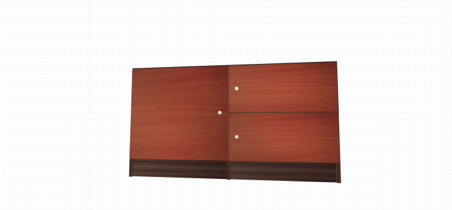
Implemented result: Please check video how it works
User story: Create TV Stand Expected result: Here is a reference TV Stand that should be constructed in our configurator
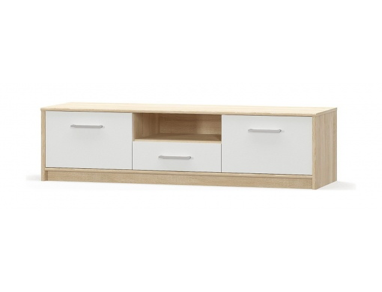
How to implement: Create a section with required height and width (same as on reference) Click button add-a-Section-to-the-design and click it two times more.
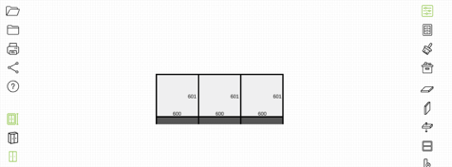
Add a shelf to the middle section
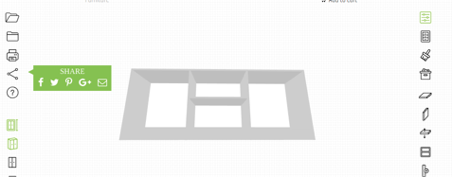
Add doors and drawers
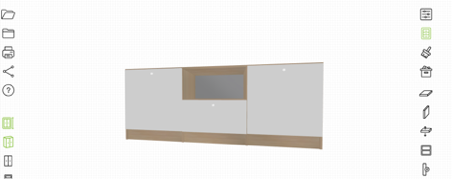
Implemented result: configured TV Stand is very similar to the reference example. Here is a more detailed video of how it works.
This article was originally published on the ideaintech Medium blog on 2019-04-05.
Read the original on Medium View on Medium